Chain Waxing Made Easy. And Properly.
The Ultimate Chain Waxing Guide by Der Baranski Flashback:About ten years ago, young Marcus was with a group of cyclists: “Hey, I’m Der Baranski, and I dip my bike chains…
Datum
Lesezeit

The Ultimate Chain Waxing Guide by Der Baranski
Flashback:
About ten years ago, young Marcus was with a group of cyclists: “Hey, I’m Der Baranski, and I dip my bike chains in hot wax.” The response was nothing but pitying laughter. What seemed like a quirky, oddball thing to do back then is now mainstream: hot waxing bike chains. And there’s a good reason for it:
Smooth Ride
The improved performance of waxed chains has been proven multiple times, most recently in tests by engineer Robert Kühnen for Tour and Bike. The test was well done and not only confirmed the marginal gains from chain waxing but also highlighted a second, more important point for many people than the few watts saved compared to factory grease, which is used as rust protection on chains:
Less Wear
Because less dirt and abrasion stick, all drivetrain components last much longer than with oil-based lubricants. Parts that were once treated like disposable items, like cassettes, chains, and chainrings, now often cost a small fortune. Want an example? The new 13-speed SRAM RED XPLR cassette for gravel bikes has a whopping MSRP of €675. You won’t see much of this anymore—like dirty derailleur pulleys—but if you do, it’s much less frequent.

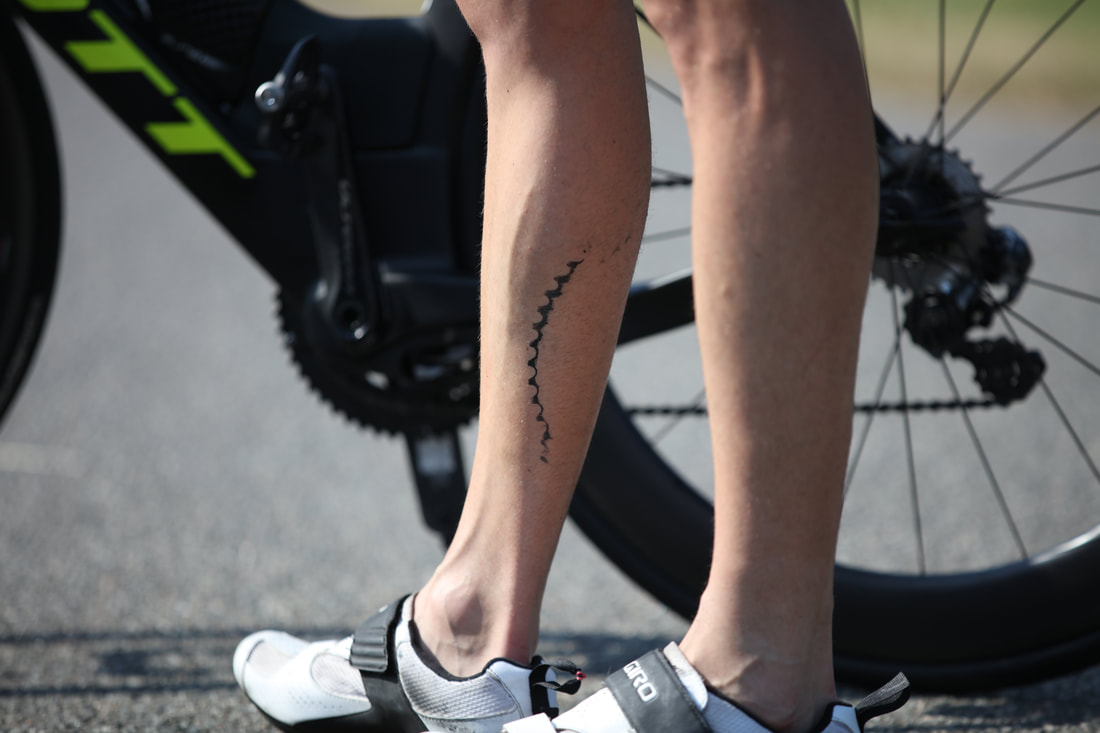
No More “Idiot Tattoo” on Your Calf
With no grease and depending on your aftercare, once hot-waxed chains stay much cleaner (except for a few exceptions down below). This means you won’t get laughed at anymore by your cycling buddies when you show up to a Tuesday ride with dirty calves or a pair of Rapha socks, or show greasy streaks on your couch, car ceiling, or your mom’s Persian rug.
To make sure newbies can get started with chain waxing as easily as possible, I’ve put together everything I’ve learned, from tips and dos to don´ts and common user mistakes—things I’ve either done myself or still get in my inbox regularly. And by the way, this isn’t rocket science, but sloppy work is still sloppy work.
So here are the ultimate chain waxing tips from Der Baranski. Everything below applies to the products I use and almost all others in the chain care realm. Oh, and if you want to buy wax, the necessary tools, or fully pimped chains from me, just head over to the derbaranski.shop—it was born from the same obsession I had back then.
Start with a New Chain
There’s no avoiding it, if we want to go full throttle, the chain needs to be thoroughly clean, grease- and dirt-free, for the wax to stick properly. So, go ahead, buy new chains. They may be coated in rust protection grease, but there’s no dust or dirt on them yet.
Quality of Chains
I’ve seen my fair share of cheap chains that already discolor during the ultrasonic cleaning. Budget versions of KMC were particularly bad. They rust easily. That’s why I only use Shimano Ultegra/XT or SRAM Force/Red chains. They’re durable enough, thanks to nickel-plating and chrome-plating on pins, rollers, and links.
Wiederverwendbare Kettenschlösser
Sowohl SRAM als auch Shimano verkaufen nicht nur gerne Ketten, sondern auch Kettenschlösser. Die sind auf jeden Fall um Welten besser als Nietstifte und zum Wechseln der Kette unerlässlich, wenn es ans Nachwachsen per Heißwachs geht. Allerdings sind die offiziell nur für den einmaligen Gebrauch. Ich setzte deshalb schon seit Ewigkeiten auf die von YBN (Yaban), die man mehrfach auf und zu machen kann. Besonders gut geht das mit den beiden Zangen der Taiwanesen. Alle Varianten, auch für die Flattop-Ketten wie die von SRAM, findet man hier bei mir im derbaranski.shop.

Intermediate Step for Race Chains
Pro tip for race chains: I run new chains on the rollers once a year to polish them from the inside and squeeze out some more performance. After this, they go through the same process and release a black mess of grease and metal shavings. This setup is pre-configured for race season.

Remove the Factory Grease
The manufacturer’s grease is the last thing you should use for lubrication during actual riding. It’s only there to prevent rust while the chain’s sitting in a warehouse or shipping container. People often underestimate corrosion—just ask in Asia. I spent ages trying to get a grease-free chain and still, they come with a thick layer of grease. Getting rid of this grease is by far the most time-consuming step in chain waxing, but it’s worth it. After this, you’ll never have to do it again, and the waxed chain will last far longer. If your waxed chain starts squeaking after 100 kilometers, this is probably where you messed up. So, how do you do it right?
Good Old Washing Benzine

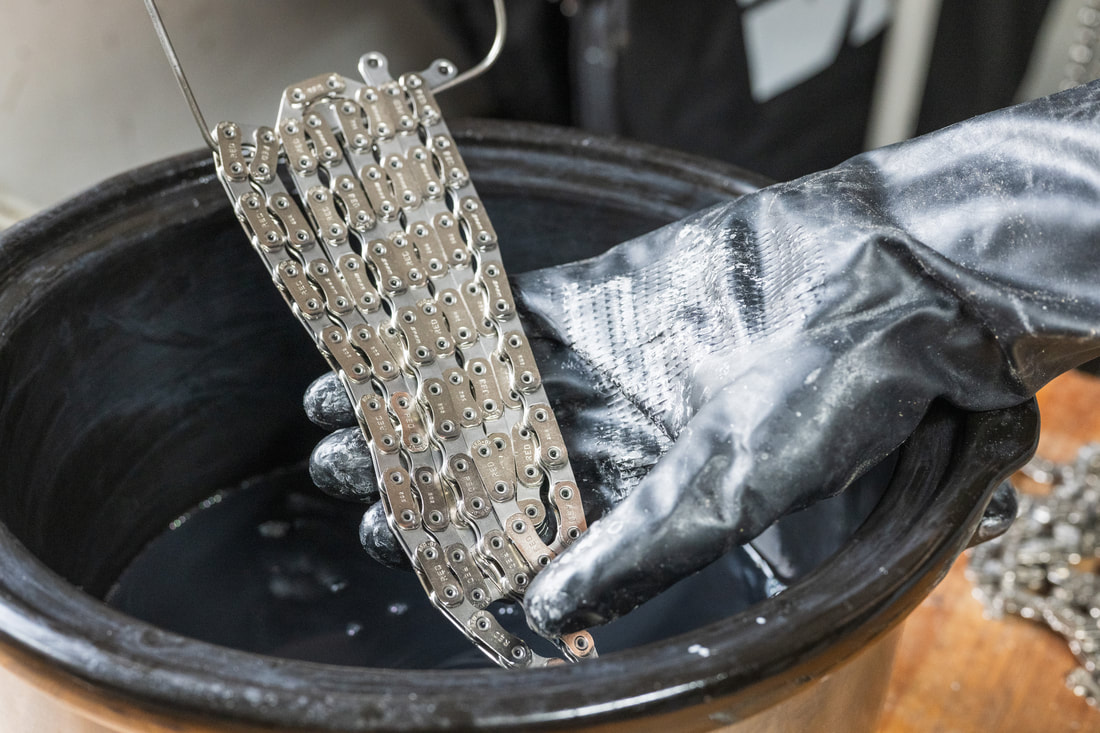
There are tons of “miracle” chain cleaners out there. I don’t need sprays or aerosols—just washing benzine, a microfiber cloth, and a big mason jar. I soak the chains overnight, then pull them out with rubber gloves, wipe them off, and put them back into fresh washing benzine until it stays clear after 2-3 rounds. SRAM chains are particularly sticky with their white lubricant. For several chains, this works better than for just one. If you like, you can filter the washing benzine with a coffee filter and reuse it at least once. If you’re thinking of using brake cleaner—don’t. It’s expensive, and most of it’s just washing benzine anyway, and it also contains additives that can ruin the chain. Remember, we want the chains clean, bare, and ready for the next step.
Finger weg von Aceton
Bisher taucht hier nicht einmal Aceton auf und das hat seine Gründe. Du nimmst das immer, weil es ja das Gleiche ist und wunderst dich dann, warum das Wachs später nicht so gut hält oder da immer noch Fett rauskommt? Aufgepasst, dann habe ich jetzt was für dich:
So toll Aceton auch den Lack von deinen Nägeln lösen mag, für alles mit Fett und Öl ist das nicht erste Wahl, weil es da eben nicht so gut funktioniert wie Waschbenzin. Beinahe immer, wenn sich jemand über die mangelnde Standzeit von gewachsten Ketten bei mir beschwert, kommt früher oder später raus, dass er auf Aceton gesetzt hat. Siehe dazu neben dem Video hier auch noch ein Paper aus dem Chemielabor der Uni Mainz.
Ach ja, alles mit Lösungsmitteln macht man bitte nur draußen an der frischen Luft und gern trotzdem neben Gummihandschuhen auch mit Atemschutzmaske.
Links seht ihr den ersten Gang, rechts dann das klare Waschbenzin nach mehreren Durchgängen.


Hier kürzen dann viele Leute ab und geben die Ketten nach dem Ablüften ins heiße Wachs. Kann man so machen und das Ergebnis wird für die meisten vielleicht auch reichen, aber hier soll es ja einmal um den Goldstandard gehen.
Ultrasonic Cleaning for Optimum Results

Once the chain’s cleaned, it might look shiny, but after an ultrasonic bath, you’d be shocked at how much more comes out (yes, from a brand-new chain!). That’s why you won’t want to skip this step. An ultrasonic bath removes not just grease, but also fine metal shavings. After this, the chain’s completely ready for the wax.


Würde man da jetzt draufwachsen, würde das nicht nur das Anhaften stören, sondern in der Kette, da wo das Wachs samt Additiven ja hinsoll, wie Schmirgelpartikel arbeiten. Damit das richtig gut ist, braucht man allerdings ein gutes Ultraschallgerät mit kräftiger Ultraschall- als auch Heizleistung. Hier steht inzwischen was Großes von Allpax mit 360 Watt Ultraschall und 450 Watt Heizleitung. Wenn eures keine Heizfunktion hat, geht auch das Erhitzen vom Wasser per Wasserkocher. Was zu wenig ist: Das kleine Gerät von Oma Erna, mit dem sie Brille, Broschen und Gebiss gereinigt hat. Wichtig ist ein Spritzer (wirklich nicht mehr!) alkalischer Ultraschalllösung und auch hier setze ich auf was von Allpax oder Tickopur R 33.
Das dauert bei mir maximal zehn Minuten. Man kann es hier auch übertreiben, etwa wenn man das auf eine halbe Stunde einstellt und 300 ml alkalische Lösung in zwei Liter Wasser tut, fangen auch hochwertige Ketten an zu gammeln und laufen an.
Weil ich das auch immer wieder gefragt werde, nein, es ist keine gute Idee, brennbare Lösungsmittel per Ultraschallgerät zu erhitzen, um da noch mehr Fett und Späne rauszuholen, sonst macht es schlimmstenfalls irgendwann Puff.
Final Rinse with Isopropanol
Before the wax bath, rinse off the ultrasonic residue with isopropanol. This ensures the chain is almost surgically clean and perfect for the wax bath. No shortcuts here—don’t ruin the progress with random degreasers!

Entsorgung aller Flüssigkeiten
Eigentlich selbsterklärend, aber alle dieser Flüssigkeiten gehen bitte nach dem Benutzen zum Wertstoffhof und nicht einfach ins Klo. Was ich auch haarig finde, manchmal aber empfohlen wird: Einfach alles unter fließendem Wasser abspülen und damit dann ins Abwasser. Auf sowas kommt man wohl, wenn man in der Küche einen Häcksler am Abfluss hat und alles an Müll einfach runterspült. Also nochmal, bitte nicht machen.
Into the Wax!


The freshly cleaned, dry chains are now ready for their wax bath. I use a real slow cooker (the kind from the kitchen) to heat up the wax to around 90°C. Most hot waxing products are based on paraffin and a few additives like tungsten disulfide. Stirring the wax helps ensure the additives get into the chain. The chain should bathe for about 3-4 minutes.

Die allermeisten Heißwachsprodukte funktionieren auf Basis von Paraffin und ein paar Zusätzen wie Wolframdisulfid und Molydänsulfid und damit diese auch in die Ketten eindringen können, lohnt sich das Rühren wie mit einem Rührbesen im jetzt sehr dünnflüssigen Wachs. Gesamtdauer je Kette im Wachs sind bei mir grob drei bis vier Minuten. Kleinere Wachstöpfchen, wie mal sie im Kosmetikbereich nutzt, kann ich nicht empfehlen, weil die einfach viel zu klein sind, um mit der Kette so richtig zu rühren. Bei mir kommen meist Geräte von „von Shef“ oder „Russel Hobbs“ zum Einsatz und wenn das Wachsen vorbei ist, geht der Topf ins Regal bis zum nächsten Mal. Weil das immer mal gefragt wird: PTFE ist heutzutage zum Glück kaum noch irgendwo drin, außer in vielen der Erstschmierungen. Warum das bei mir schon ein Relikt aus der Vergangenheit ist? Bitte siehe hier.
Warum partout Schongarer?

Was ich explizit nicht empfehle, sind Kochtöpfe und die dann noch in der Küche. Hier besteht neben der Gefahr, dass es Mecker gibt wegen der Sauerei mit den Wachsflecken auch das Überhitzen auf deutlich über 100 Grad, was nicht nur einige der Wachsmischung kaputt macht, sondern auch zu Wachsbrand führen kann. Und die Bude abzufackeln, weil man die Kette wachsen wollte, empfiehlt nicht mal Der Baranski. Was aus meiner Sicht auch keine gute Idee ist, sind relative kleine Wachstöpfe, die eigentlich aus dem Kosmetikbedarf stammen. Diese sind einfach zu klein, um das Wachsgemisch umzurühren. Was mir auch nicht einleuchtet, ist der Ansatz per Ultraschallgerät Heißwachs ins Ketteninnere einmassieren zu wollen. Voll ist voll und wenn die Kette gesättigt ist, dann bringt der Ultraschall da auch nicht mehr Wachs rein. Fett rausholen kann man damit wie schon beschrieben aber prima.
Which Wax is Best?

It’s always the brand the manufacturer says is the best, of course. I’ve been using Molten Speed Wax for years—it’s made in the USA with paraffin. It’s easy to use, lasts forever, and performs top in tests. Plus, it’s affordable.
Re-waxing and Maintenance
After riding, the chain should be re-waxed with hot wax. I’ve got multiple chains rotating on my bike, and after 300-500 kilometers, I swap for a fresh one and pop the old one back into the wax bath. If you want to give your chain a fresh coat, use a separate bath with Molten Speed Wax.
Liquid Lubricants as an Alternative
If you prefer a simpler approach, you can use liquid lubricants, like the Dry Fluid High Kettengleitstoff, on your chain while riding. Just make sure it penetrates well and dries off.
Wet Conditions & Mud
Waxed chains perform great in rain and mud. After a ride, just rinse with water and wipe with a dry cloth to prevent rust. With oil-based chains, I’ve seen them rust even with regular maintenance—it’s all about keeping your gear clean.

Breaking in the Chain
Before mounting a waxed chain, it needs to be “broken in” because it can be a bit stiff.

Use a piece of plastic pipe to help loosen it up before riding.

Summary: Der Baranski’s Guide to Chain Waxing
- Start with a new chain
- Choose high-quality chains (Shimano, SRAM)
- Remove the factory grease
- Ultrasonic clean for best results
- Final rinse with isopropanol
- Wax bath for 3-4 minutes
- Choose good wax (Molten Speed Wax)
- Re-wax after every ride
- Use liquid lubes for less effort
- Handle wet conditions with care
- Break in the chain before use
Conclusion: Chain Waxing the Baranski Way
Chain waxing isn’t rocket science, but when you put in a little effort, it makes a huge difference in performance and longevity. With the right products, technique, and a bit of patience, you’ll soon have a chain that lasts almost forever and rides like a dream. Want to try it out for yourself? Check out my online shop for all the gear you need to get started or get one of my Baranski chains yourself!
How’s that?